

 877.514.0276
  info@jsl.marketing
Picture this.
You just received access to your brand new WordPress website and you couldn’t be more excited to show it off.
And for a couple weeks everything seems to be working fine. But now you’ve decided that you’d like to start blogging and publish regular blog posts to your new website.
You start to panic because, of course, publishing a blog posts has to be difficult and time-consuming…right?
Wrong!
Creating a blog in WordPress is actually incredibly simple – it really just comes down to learning the ins and outs of the system.
Which is exactly what we are going to talk about today!
So if you’ve ever wondered how to create a new blog post in WordPress, keep reading – I’ll walk you through all the steps in the tutorial below.
How to Create a New Blog Post in WordPress
First, let’s get the basics out of the way. I’m assuming that you already have a WordPress website (if you don’t – here’s a great article about why you should!) and the correct login information for the backend of the website.
Got that information ready? Ok, let’s dive in!
Step One – Establish Your Blog Page
If you expressed an interest in blogging during the website design process, it’s likely that you already have a designated blog page on your website.
It’ll probably be titled “Blog” and will be accessible through your menu bar at the top of the homepage.

If you’re having trouble finding the blog page, you may not actually have a designated blog page set up on your website. It’s not too difficult to do this – I’m planning on covering this in one of my next tutorials, so be sure to stay tuned for that.
But, assuming that you have a blog page established, you are all set up and ready to start publishing blog posts.
Step Two – Create a New Post
On the back end of your WordPress site, you should see a tab called “Posts” in the menu bar on the left-hand side of the screen.
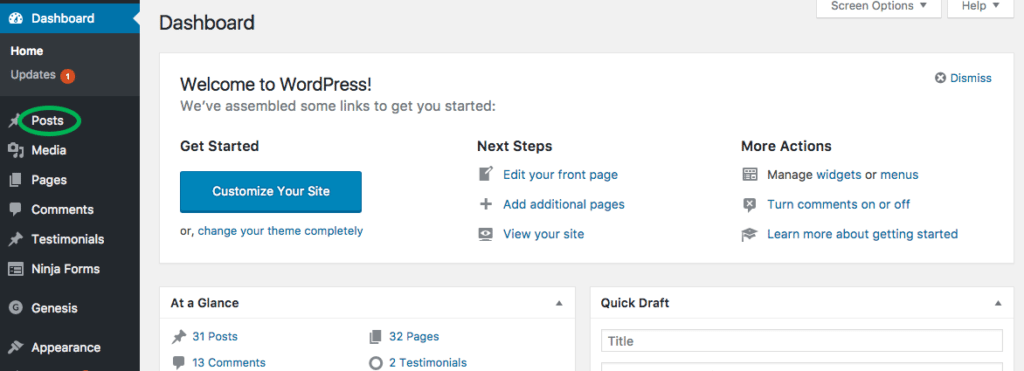
Hover over this menu item and then click on “Add New.”
This will take you to a fresh post for your new blog. Now, if you’d like to take a look at any past blog posts you may have published, all you have to do is just click on the “All Posts” button just above “Add New.” From here you can see a full list of all the blogs on your website.
However, if this is a new website, there likely won’t be anything to see here until after you’ve published your first blog post.
Anyways, here is what you should be looking at right now:
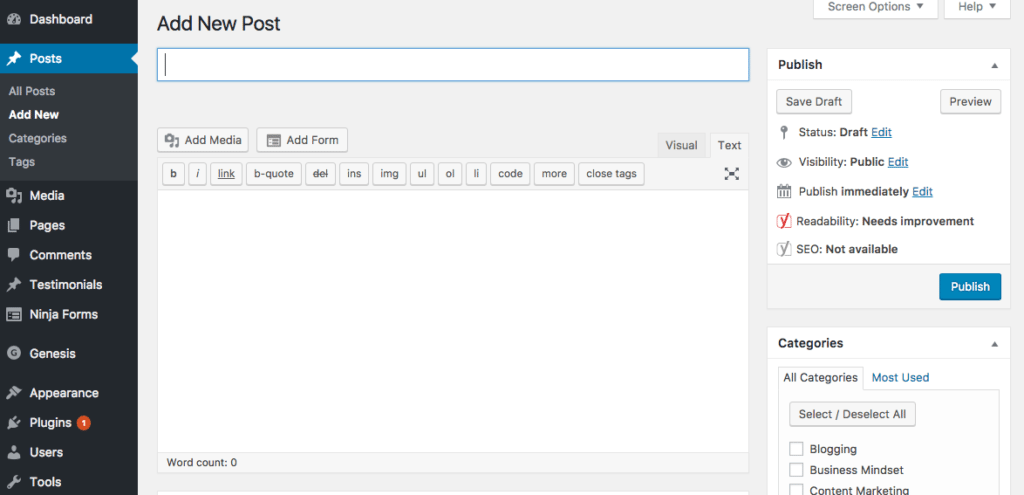
Step Three – Add Content to the Post
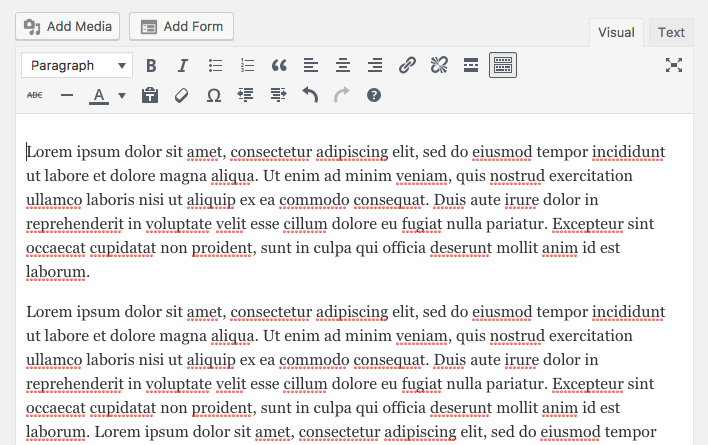
Now comes the fun part – writing the content! The composition area in WordPress is fairly similar to Word, but it may take a little getting used to.
Be sure you have the “Visual” toggle on and not the “Text,” unless you want to view what you write in straight HTML. It’s totally fine either way, but if you’re not used to HTML it could be a little confusing.
You can see the difference here:
Visual Toggle

Text Toggle

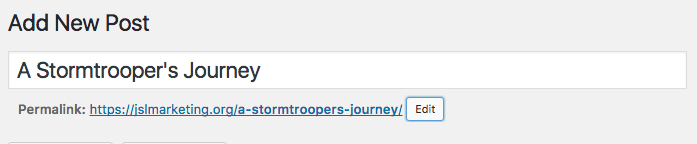
You’ll also see a space to add a title (the box where it says “Enter Title Here”). This is what will appear on the post as the title, so be sure to write something that’s both descriptive and to the point.
From here, you can write your blog post in the white area below the title bar.
You can use the buttons in the toolbar to create everything from bolded or italicized font to numbered or bullet pointed lists and more.
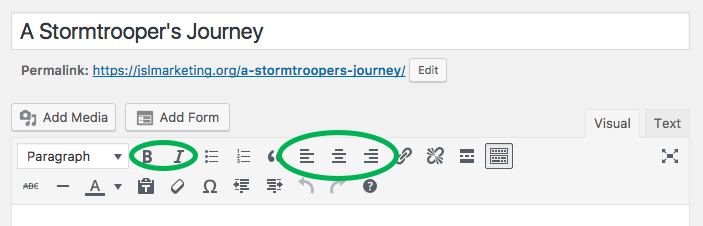
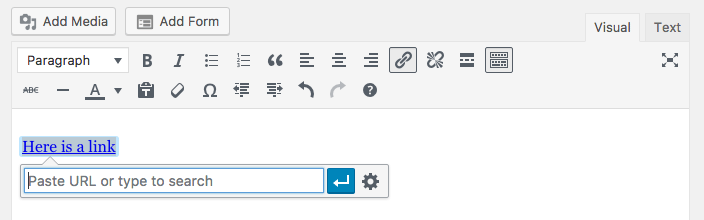
You can also adjust the alignment of your text by using the alignment buttons and create internal or external links by highlighting the desired anchor text and linking it to the appropriate post or page.
Step Four – Add Images to the Post
It’s always a good idea to include at least one image within your blog post. This helps to keep your readers’ attention and make the content a bit more interesting.
To add an image, start by clicking into the post where you’d like to place the image. In our example here, I’m going to place it at the top of the page and then align the image left so it sits nicely next to the text.
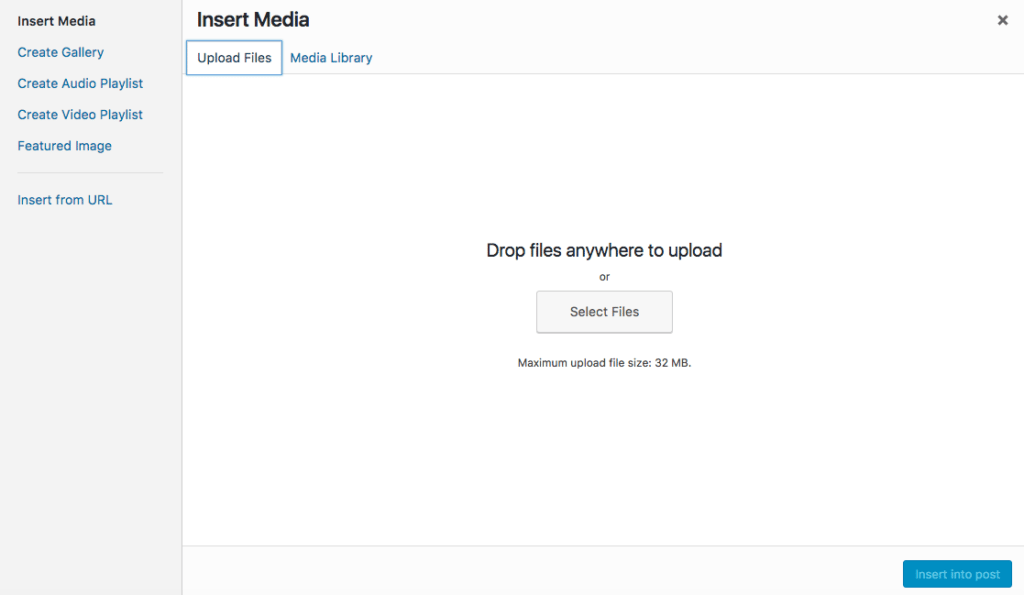
So once you’ve placed your cursor where you’d like the image to go, click on the “Add Media” button, and then click “Upload Files.”
From here you can either choose to upload files from your computer, or simply drag and drop them onto the screen from your desktop. That’s usually what I do – I just think it’s easier! Just drag the image on to the screen and wait for it to turn blue. Then, release the image and it’ll show up on the screen.
Next, check to be sure that the image is indeed selected – there will be a little check mark next to the image, along with a blue border.
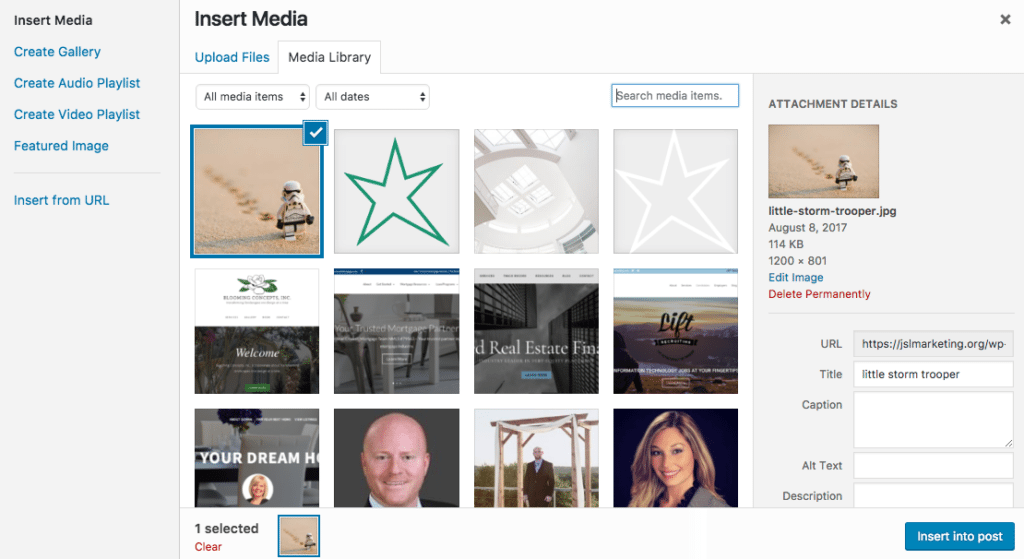
If you want to set the alt tag, alignment, links or size of the photo, you can do that in the side panel here:
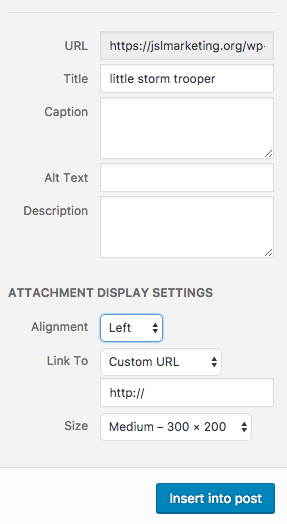
In our case, I’m going to set the alignment to “Left” and choose “Medium” as my size. Once you have your choices selected, click “Insert into Post.”
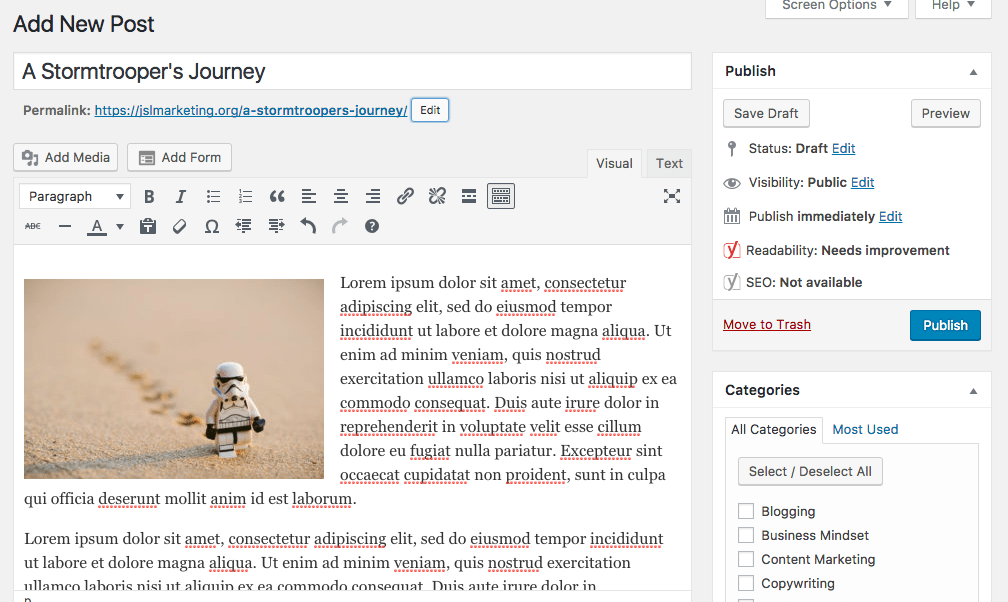
Now you should see the image on the post. If you’d like to add more images to the post, just repeat the same process but in different locations on the post. Here’s one with an image on the right, half way down the post:

Once you have all your content and images in place, it’s time to publish!
Step Five – Publishing Your New Blog Post
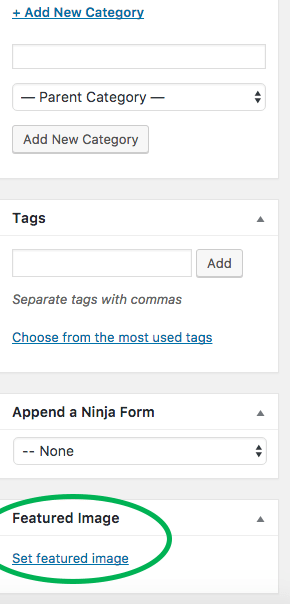
The last step before publishing is to ensure that the correct category is selected, along with the publish date and featured image if you’d like one.
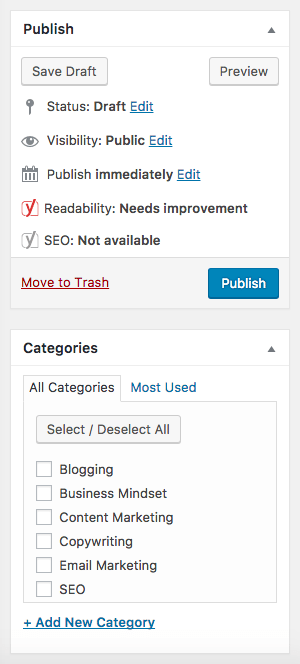
The category is just used to basically describe what your blog post is about. If you don’t have any created yet, you can add a new one by clicking “Add New Category” and then just typing in the desired name of your category.
Once that’s completed, check the box next to the category your blog post best fits into.
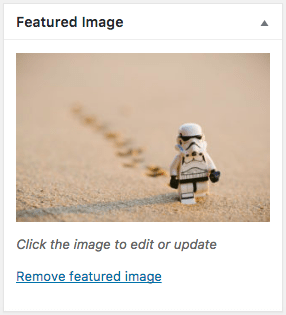
Then, if you’d like to set a featured image scroll down a bit to where it says “Featured Image.” Click the “Set Featured Image” button and then select your desired image. This step isn’t necessary, but if your blog is set to display featured images it will look nice to include one.
Here’s what mine looks like:
Now, it’s time to publish! Scroll back up to the top of the page. If you want to set the blog post to publish at a future date, you can do so by hitting “edit” next to where it says “Publish Immediately.”
If you want to publish immediately, just leave that option alone. Also, if you’d like to preview your blog post before it goes live at any time, just click on the “Preview” button. Or if you’d like to save the post for later, just click “Save Draft.”
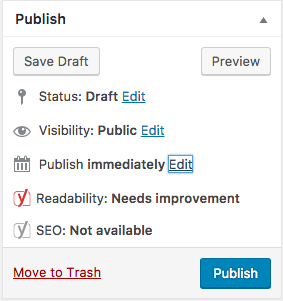

However, if you’re ready to publish, click the blue “Publish” button.
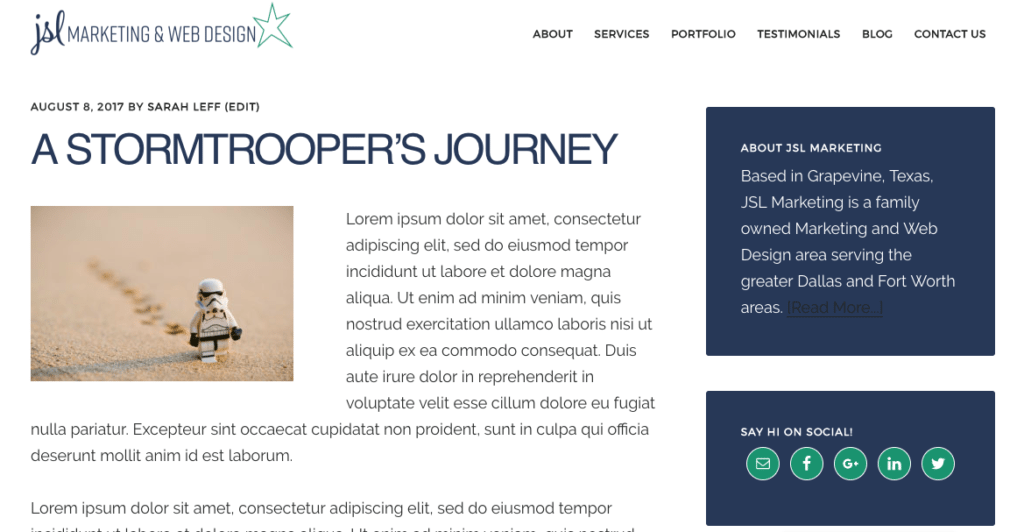
Congratulations! You just published your first blog post!
In order to see it, click on the “View Post” link.

And now you should be able to see your new blog post.
That’s it!
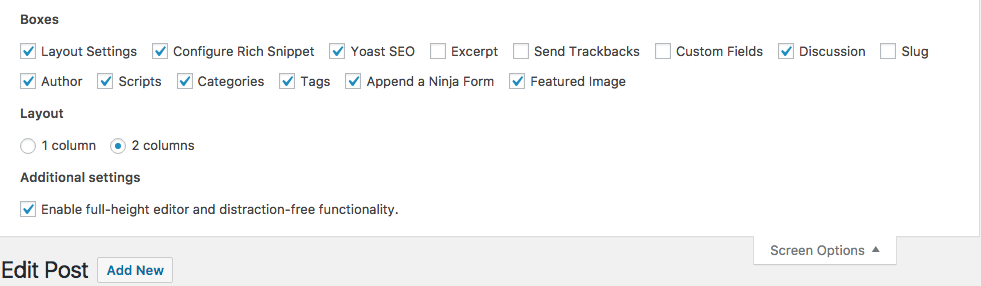
Side note: If for some reason you couldn’t see some of the same items on your screen as what was on mine, it’s possible that they’ve been turned off in your settings. To fix this, go to the top of the page and click “Screen Options.”

From here you can see all the different options available. Be sure the main ones like “Categories” and “Featured Image” are selected. Then add whichever other ones you think might be useful.
Wrapping Things Up
I hope you enjoyed this tutorial on how to create a new blog post in WordPress! I am planning on doing more WordPress tutorials in the near future, so be sure to tune in for more.
And of course, if you have any questions or would like someone from our team to either help you with site edits or build you a new WordPress website, please don’t hesitate to reach out. You can give us a call at 817-470-5274 or fill out our contact form here or below – we look forward to hearing from you!